Organisation
Articles in this Topic
The Organisation record is the primary record that all the associated Departments, Files and Document records are attached to.

The Organisation menu consists of;
- Details - some basic details for the Organisation record and a list of any existing Departments.
- Users - interface for adding and managing Users of ModalConnect
- History - audit logs of all activity
Note: Access to the Organisation and data is restricted to Users with the required permissions.
To open the Organisation record, from the top menu click on Settings and then Organisation.
This opens the Organisation Details page displaying the Organisation information in the top half of the page and the list of (any) existing Departments under that.

Edit Organisation Detail
To edit the Organisation Details click the Edit Organisation button within the Organisation info panel.
The Editing panel allows changes to the Title - Organisation Name, or to add or update the Logo. To add or update the Logo click the Choose File button and select the Logo file (this need to be a small file).
Click the Save and/or Finish button to save changes and return to the Details page, or Cancel to close the panel without saving changes.
WARNING If the Status is set to Inactive then the Organisation record along with all the related Department records, Files and Documents/Information Reports will no longer be available.
Any existing Departments are listed in this table (that the logged in user has permissions for). A Department record can be accessed by clicking on the Department Title. A new Department of the Organisation can be added by clicking the + button at the top right of the Department table.
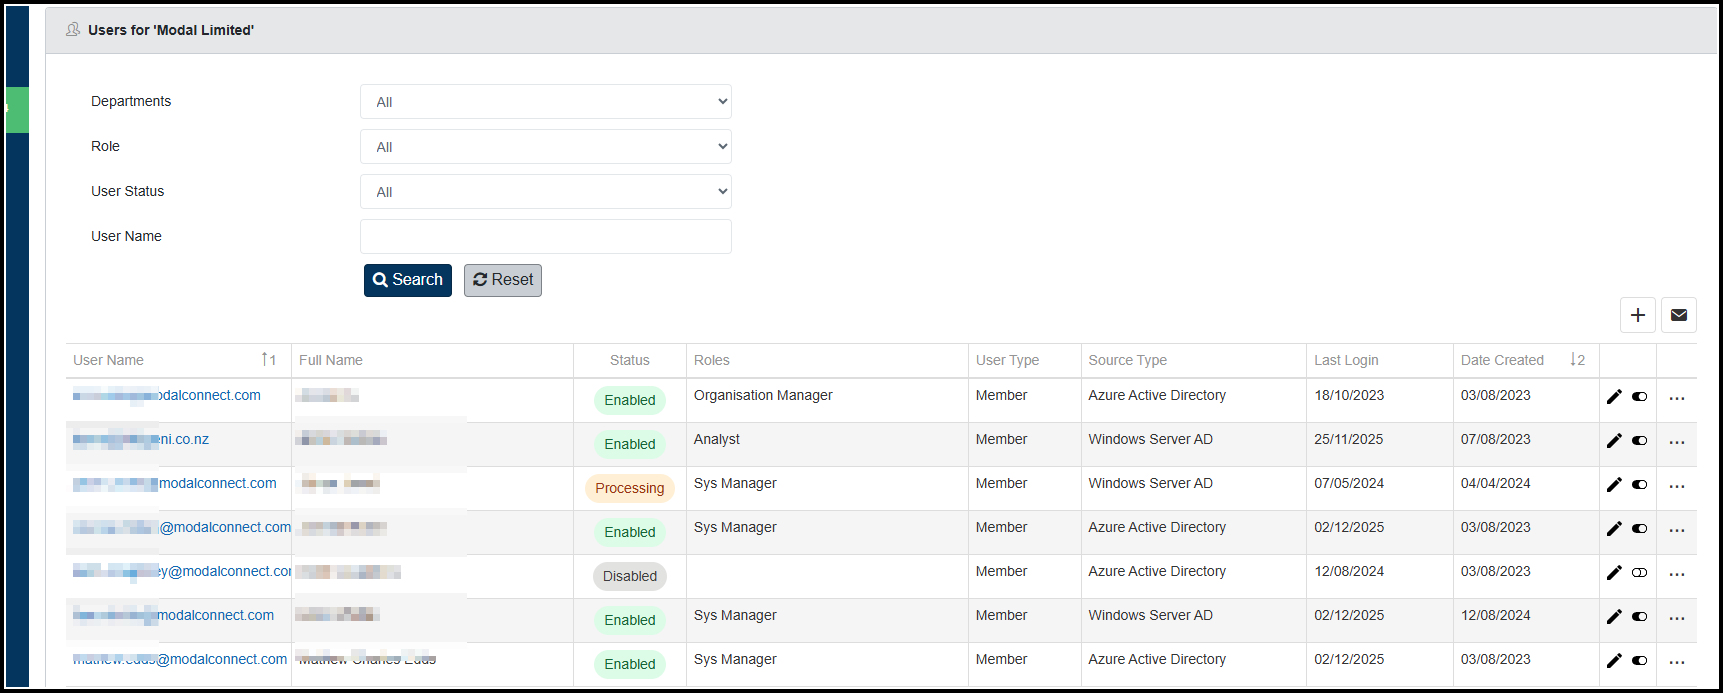
This page contains a list of any existing Users and and is where new User accounts are added or existing User accounts managed.
When the User page is open it shows the Status of User accounts as 'Loading'. Once loaded the status shows as enabled (User has an active account)
The User list can be filtered and searched by Department and\or Role and\or User Status - select the required filter\s and click Search.
Search for a User by entering their name or part of, in the User Name field then click Search.
Add New User
There are 2 options to access the Organisation user's table for adding new users;
- from the Main menu select New and then UserThis opens the New User panel on the Organisation User page.
- From the Organisation Users page select Users from the left menu

To add a User click on the add + button at the top right of the user table.
This opens the Add/Edit User panel. Modal uses Azure Active Directory - AAD.
- Search criteria - Email is the default search criteria or select ID.
- Enter the User's email or ID (to match with the Search criteria selected).
- Click search. - The User details will auto-complete with the User's details.
- Roles - Select a Role and click OK (required)
- Ensure 'Is Enabled' is checked.
- Save the User record (cannot save without a Role)

User Status
- Enabled: User has an active account with a valid Role and security permissions.
- Disabled: User does not have an Active account or a valid Role and is not enabled.
- Processing: the User account is being updated (this will be the status of any new user added) and security permissions are being processed (for the Documents and Entities of all public Departments).
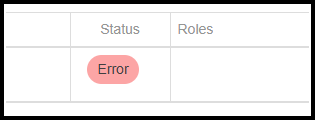
- Error: an issue has occurred- contact the Modal Helpdesk
When a new user is added to the Organisation, or a previously disabled account is Enabled, the User status shows as Processing. This initial process can take from 1 to a few hours so once added you can navigate away from the User page or even logout. Once the process has completed the account shows as Enabled and the User will be able to login and or can be added to Departments.
If the status update failed the status shows as Error - in this case contact the Modal Helpdesk by email - help@modalconnect.com and include the User's name in the details.
More than 1 user can be added to the Organisation (or Departments) at a time. These are processed via a queue and will be enabled progressively so it is not necessary to wait until the first user added has completed processing before adding another user.
Note: Users must have a valid Organisation Role to access ModalConnect. This must be added and visible at the Organisation level.
If a User has no role assigned their account is automatically disabled and if attempting to access ModalConnect they will be redirected to the Link Form.
If after clicking Save for a new user and this message shows - "Such User already exists", do the following:
1 Search the User list by entering the User's name - or part of, in the Username field and click Search (with no filters applied).
2: If not found in the Users list - in the Role filter select LiNK Form Users and then Search. In this scenario the User has either previously submitted or accessed the LiNK Form and been automatically assigned a LiNK form User account. Open their User account and add an active User Role, check Enabled and remove the Link Form User role.
Email an Invitation to User
Users can be invited via email - click the email icon and complete the form including assigning a Role and click invite.
NB: Only Federated logins are accepted e.g no personal Gmail or Hotmail accounts.

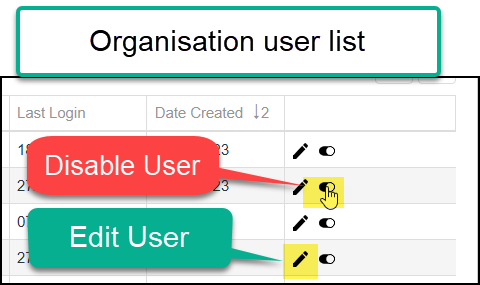
Edit, Disable or Enable User Account
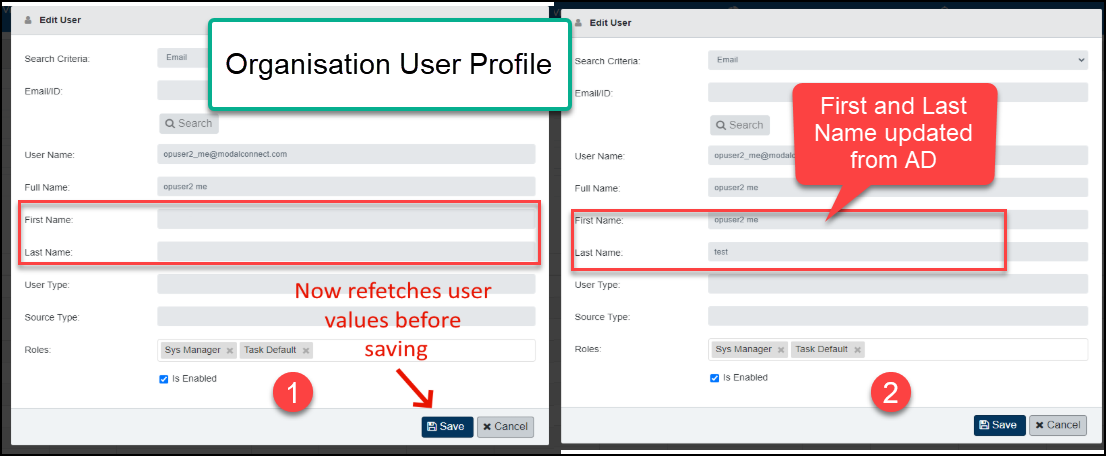
To edit a User account click the Edit (pen - icon) button, changes can only be made to the Roles(add or remove roles) or, to update the User's profile from their AD profile just click save.
To disable an account, this can be achieved via the Edit function which opens the User profile, remove any Role and disable the account by un-checking 'Is Enabled' then Save. Alternatively to disable the Account - click the on/off button in the right column and confirm the action in the pop-up.
Once a User account has been disabled, the User's role is removed and the User is automatically removed from all Departments, Files, Documents and associated records. It may take up to 30 minutes for the Status to change from Enabled to Disabled.
To change a LiNK Form User account to a Role to enable the User to login to ModalConnect, open the User account and assign an Organisation Role and Save. This will also re-fetch the User's details from their AD profile and update their details to include First and Last name.
Note: When a User is deactivated they are automatically removed from all Departments and Files they were members of. The User is also removed as the Owner from Documents (that they were the Owner of).
A default User account is created with the Role of LiNK Form User when a LiNK Form is submitted for the first time from anyone (that does not have an active User account and Role - other than LiNK Form User) in ModalConnect. Users with the LiNK Form role cannot login to ModalConnect and can only access the LiNK Form.

To view a list of the LiNK Form Users, in the Role filter select 'LiNK Form User' then click Search.
LiNK Form accounts are not listed under the User accounts (unless they also have a non - organisation level role assigned).
Edit LiNK FormUser Account
To edit a LiNK Form User account to change to an Organisation User account - open\ edit the User, remove the LiNK Role and assign an Organisation Role and Save. The User account's security will start processing.
This page shows the audit logs for all activity that has occurred within the selected dates. This includes activity within the Organisation record, it's Departments, Files/Cases and Documents. Permissions apply - the logged in User will only see User Logs for Departments and Files that they have permissions for.
The activity is classified within the History Type as General or Security.
General History - includes all activity where data has been added, edited or deleted.
Security History - includes user based activity - access authenticated or denied plus the adding or editing of User records or permissions.
View History
To view the General History;
- Ensure General is showing / selected in the History Type.
- Select the Start date.
- Select the End Date.
- Click Search.

Results show the - Log Date - that the activity occurred, the User Name that performed the action, the Category - where the activity occurred and a Description - of the activity.
Results can be viewed by 10 (default view), 25, 50 or 100 records per page. The number of pages of results is shown at the bottom right side of the table. The Log date and User Name columns can be sorted by clicking into the column header.
To view the Security History - select Security in the History Type and the Start and End dates then click Search.
The results have the same format as a General search and also include the Requester.
What's Next - learn about Departments
Viewing Tips
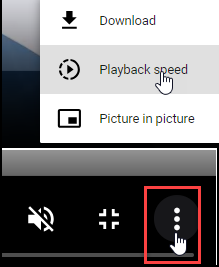
To view a video at full screen, click on the 'Full screen' button.
To adjust the playback speed (decrease or increase) click on the 3 dots and select Playback speed.
Captions display best if the mouse or touch-pad are not moved or engaged once playing.
Videos have no audio.

| Note the recently added Status column detail does not show in this video | |
| Manage Organisation Settings |